Fluffy Garlic and Coriander Indian Naan, Eggless
Naan is the quintessential Indian bread. It may be true that the bread we eat daily is Chapati, but when we want to feast, we eat garlic naan. If you’re unfamiliar, naan is a leavened flatbread from India that is soft, pillowy, and bubbly with delicious charred spots. It also happens to be quite possibly my favourite bread of all time!

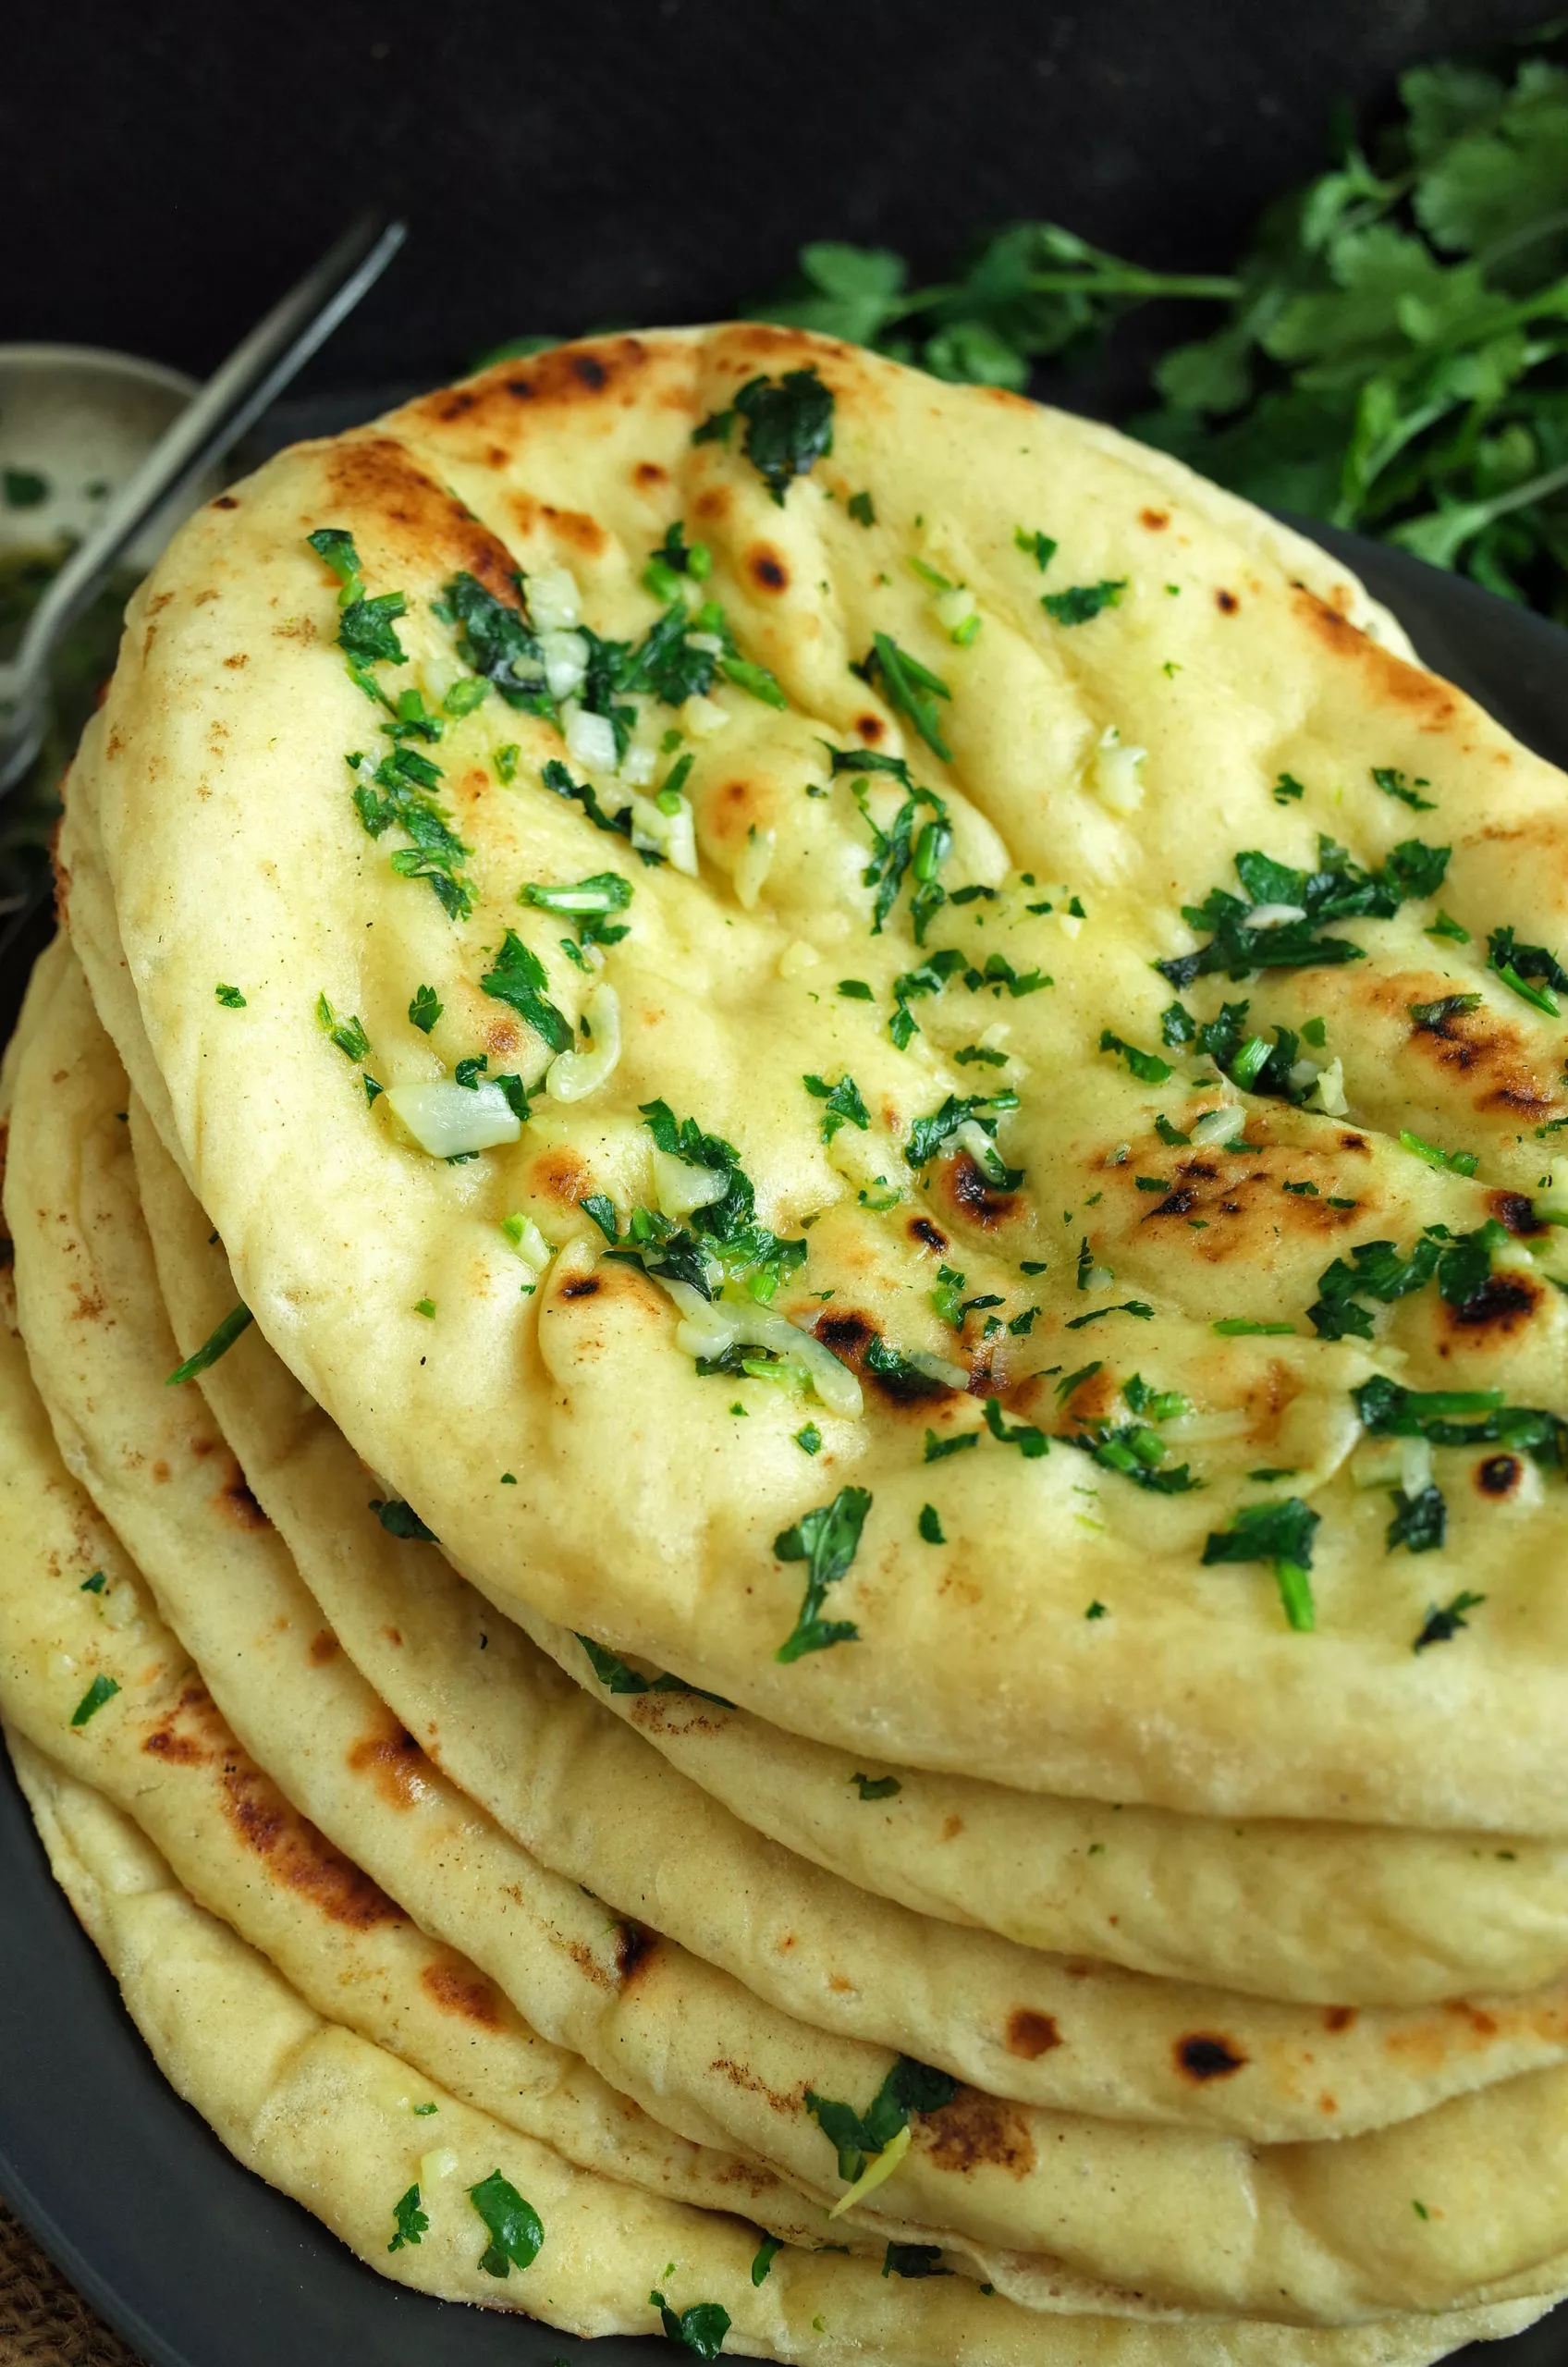
This recipe yields the best naan I’ve ever tasted. No exaggeration. It’s much better than the ones you’ll buy in a supermarket, and considerably better than even those that you’ll find at an Indian restaurant or takeaway. Gorgeously soft with just the right amount of chewiness and crispness. Dowsed in the most incredible garlic-coriander butter that makes every bite a celebration. And the flavour is out of this world. Not only that, but it’s easy! Plus, I’ve included every possible question and answer below to help you out.
After so many weeks (and eating a lot of naan!), I’m so proud to have finally perfected this recipe. I can confidentially say that once you try it, this is the only naan recipe you’ll ever need! Best of all, all you need is either a stovetop or an oven. No tandoor is needed and no compromise of flavour.
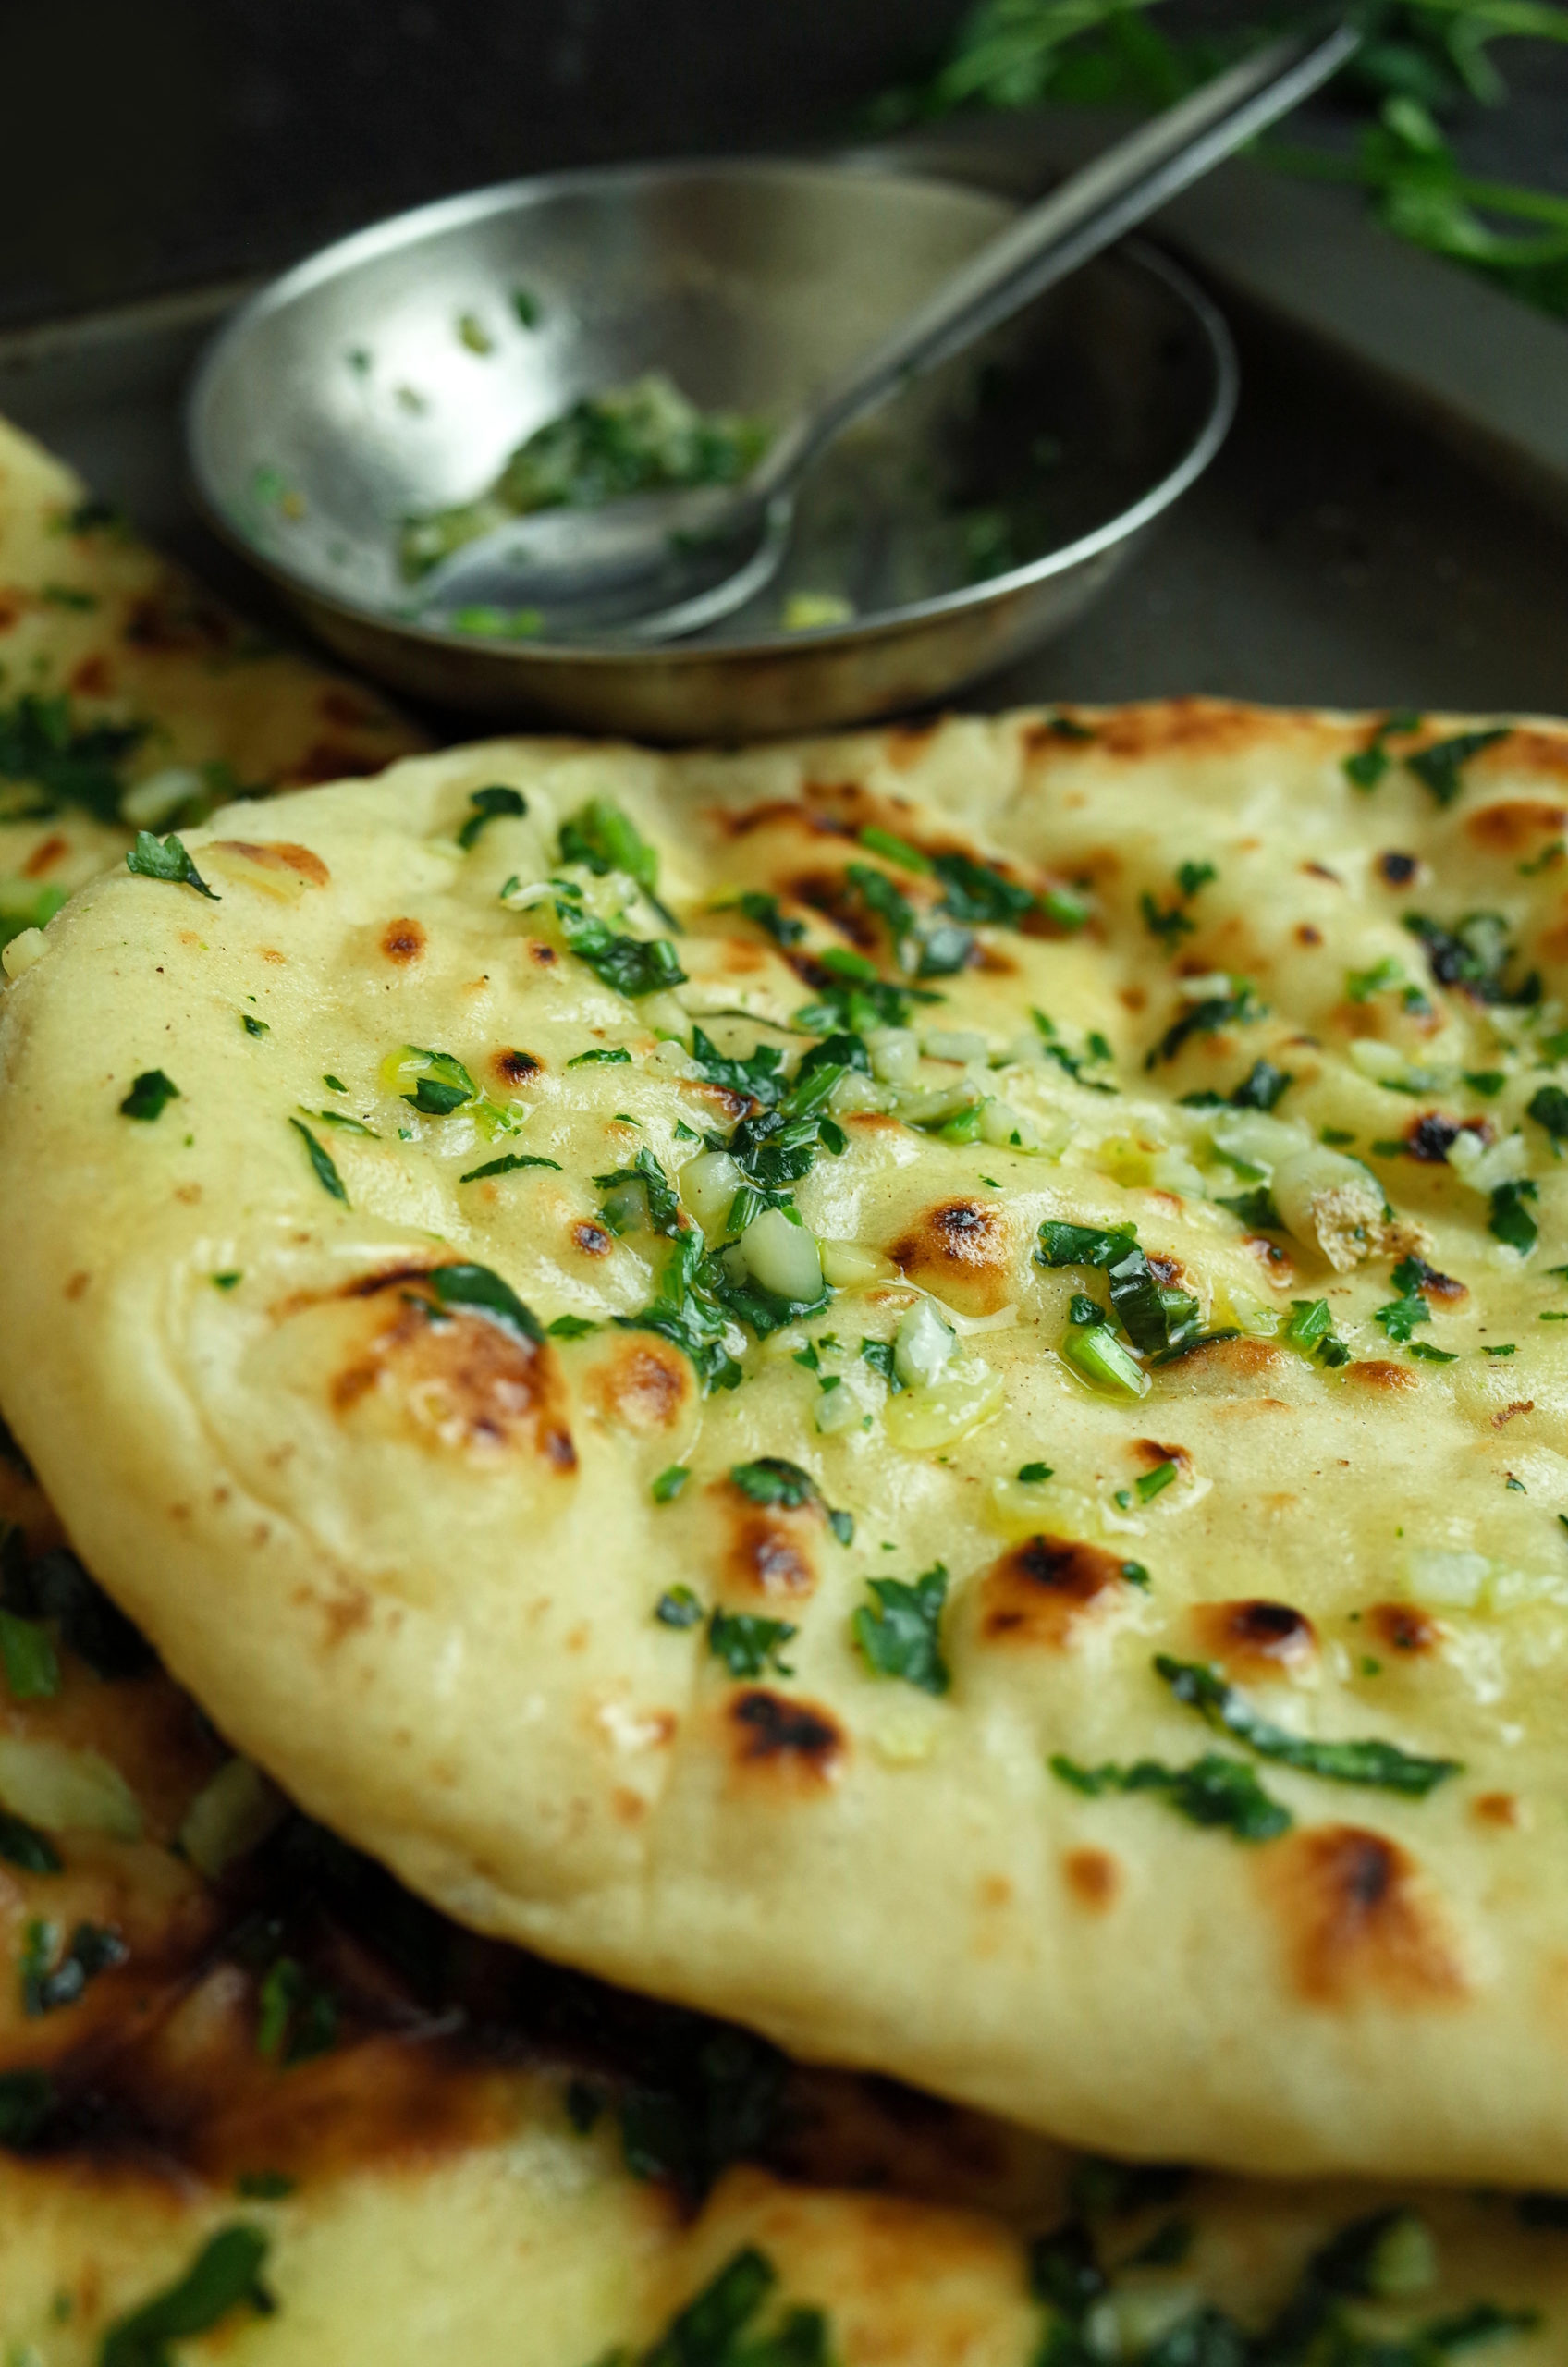
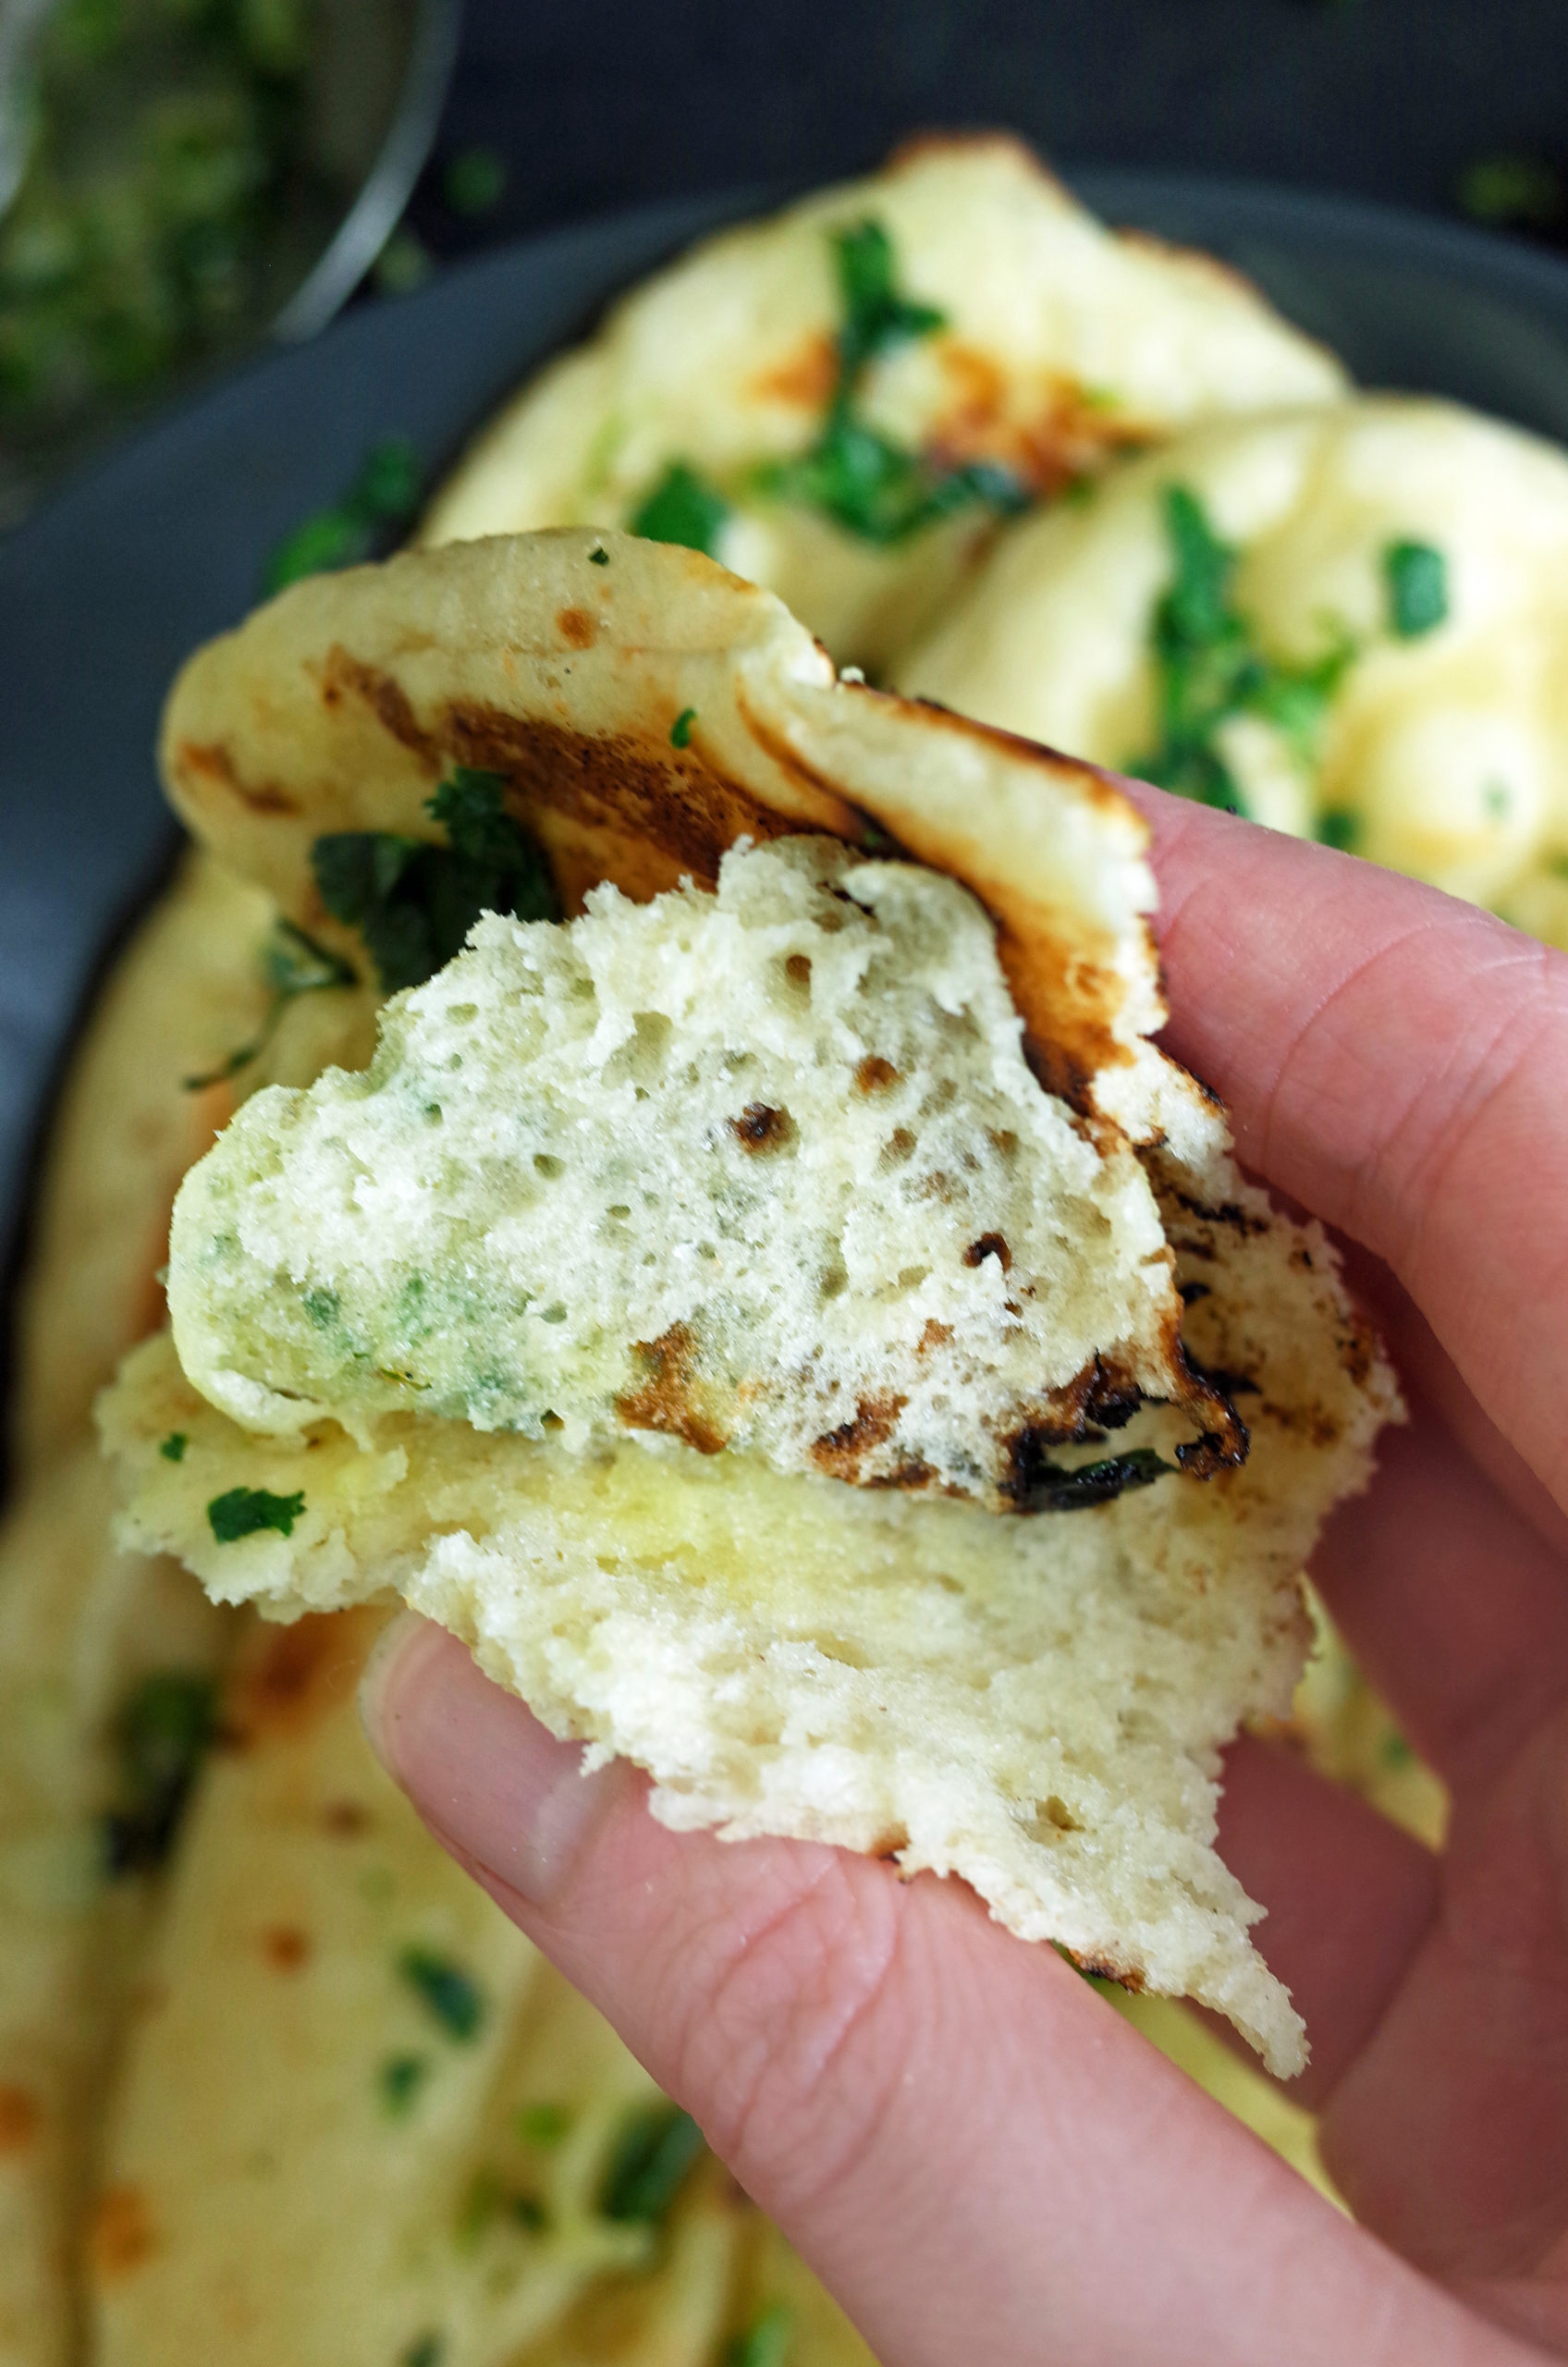
A perfect naan is soft, chewy, buttery, and mouth-wateringly delicious. This naan is all of those things and more.
Troubleshooting issues with Garlic Naan:
- My yeast didn’t bloom! If your yeast doesn’t bloom (blooming means that it’s activated – you will be able to tell because it will become ‘bubbly’), your yeast has probably died. Do not continue with the recipe. Instead, try again with fresh yeast.
- My dough is too sticky! This recipe uses a high-hydration dough (meaning it has a lot of liquid content) which is by nature sticky. It can be tricky to work with if you’re not used to it, but don’t panic – stick with it. Don’t be tempted to add more flour, as this will alter the texture of the final naan. Work the dough in a large mixing bowl instead of directly on your kitchen counter for less messy results and prepare for your hands to get a little messy! We are aiming for a smooth, sticky dough.
- Naan dough won’t stick to the tawa! In my preferred method, water is used to stick the naan dough to the tawa so it can be inverted and roasted directly over the open flame. For other cooking methods go here. However, to make sure it sticks a few things are key –
- Don’t use a non-stick tawa. Make sure your tawa* is iron or aluminum rather than any non-stick surface.
- Use cold water. Don’t use hot water to stick the naan to the tawa – it really makes a difference.
- Spread the water all over the naan. Make sure you spread the water over the naan thoroughly before you stick it to the tawa. If you miss a large section that piece will fall off.
- Don’t use too much water. The balance is important. If you use too much water the dough will become soggy and won’t stick. Use only a light brushing of water, don’t make a puddle!
- My naan isn’t fluffy or puffing. The large bubbles on the surface of the naan are created by extremely high heat. Because naan is traditionally made in an extremely hot tandoor oven, we have to try and recreate this at home. Make sure your tawa is ‘pre-heated’ and almost steaming hot before putting the naan to cook on it. Never start on a cold pan.

Can I cook Garlic Naan without a Gas Hob?
Yes, you can! A gas hob/stovetop is the most convenient for cooking Indian food and you will have a huge advantage. Although naan can be made on an electric or induction stovetop, you won’t get quite the same results that you would with gas. However, they will still be incredibly tasty – here are a few options:
- This is the most popular method – use a blowtorch! This is incredibly easy and produces amazing results with the amount of heat and control you get. Simply follow the recipe below but instead of turning the tawa upside down to roast the naan, turn on your blowtorch and move it evenly around the top of the naan until you get bubbling and charring to your taste. You can order a kitchen blowtorch from Amazon here*.
- If your stovetop is suitable for a tawa, you can follow the recipe below – simply stick the naan to the tawa and turn it upside down over the hob. Although there is no direct flame, the heat from your stovetop should still be enough to cause bubbles and charring on the naan.
- Avoid wetting the bottom of the naan. Simply cook on one side and then flip the naan and cook the other side. I used this method for a few of the naan pictures in this recipe and although it doesn’t look as great, it tastes just as fantastic.
- Abandon the stovetop altogether and pre-heat a pizza stone* in your oven. Put the naan on the hot pizza stone and cook until charred and bubbly. I have had success with this method.
Can you freeze Naan Dough or Store it?
Yes, you can! This naan freezes extremely well – which is a great and convenient option if you won’t eat all the naan at once, or if you want an easy meal later in the month. Because it’s a high-hydration (lots of moisture!) recipe, the naan retains its beautiful soft texture even after freezing and doesn’t become dry, so there is no compromise on flavour or texture.
To freeze your naan dough, simply follow the recipe as usual. After rising and incorporating the flour, portion into 8 dough balls and oil each of them very well. Wrap each dough ball separately in oiled clingfilm (lots of oil to stop sticking!) and then freeze. Naan dough will stay good for up to 3 months in the freezer. To thaw, simply leave the dough ball (still in clingfilm) on the counter for a few hours until soft enough to roll, and then cook as usual.
Alternatively, cook your naan completely and then freeze the cooked naan. This is a great option for convenience but takes up more room in the freezer. Choose whatever is best for you and enjoy having naan available whenever you feel like it!
This naan dough can also be kept in the fridge (wrapped in clingfilm) for up to 3 days.
Great Variations for Homemade Naan:
- Pudina Naan. Instead of using Coriander, add some finely chopped mint to the garlic butter. The flavour will be gorgeously fresh and complement any curry you want to serve it with. You could even mix coriander and mint together.
- Kalonji Naan. Simple – add a small amount of kalonji to the dough when making it – or add them on top when rolling out. These little seeds are a traditional bread topping and have a flavour reminiscent of onions.
- Chilli Naan. If you like your naan a little spicy, simply add some red chilli flakes to the Garlic Butter. Alternatively, sprinkle a little Red Chili Powder or finely chopped Green Chilis on top of the naan before rolling it out.
- Stuffed Naan. Well, the possibilities here are endless! You can stuff these naans with vegetarian keema (minced ‘meat’ curry), spiced potato, cheese, or paneer, and even spicy onions!
This Garlic Naan Recipe is…

Fluffy, Soft & Bubbly Garlic and Coriander Indian Naan (Eggless)
Ingredients
For the Naan Dough:
- 50 ml warm water
- 7 g active dry yeast 7 grams = 2 teaspoons
- 8 ½ g granulated sugar 8.5 grams = 2 teaspoons
- 150 ml full fat milk warm
- 400 g plain flour all-purpose (AP) flour
- 6 g salt 6 grams = 1 teaspoon
- 180 g natural yoghurt
- 2 tablespoons oil
- 40 g plain flour to be added later
For the Garlic & Coriander Butter:
- 40 g butter
- 2 tablespoons garlic finely minced
- 20 g fresh coriander cilantro, finely mined
Instructions
Make the Dough
- Begin by activating the yeast. Add 50 ml warm water (not boiling, as this can kill the yeast!) to a small glass along with 7 g active dry yeast and 8 ½ g granulated sugar. Mix with a spoon. Let the mixture sit for around 10 minutes, in which time the yeast should bloom (turn frothy and develop bubbles).
- Heat 150 ml full fat milk in a small saucepan over low heat. Don't bring to a boil, just warm.
- Sift 400 g plain flour and 6 g salt into a large mixing bowl. Add the activated yeast mixture, warmed milk, and 180 g natural yoghurt. Mix — use a bread dough whisk, as it'll be too warm to handle at first. The dough will be extremely sticky. Don't worry! Begin kneading with your hands. Avoid using your knuckles. Pick up the dough and slap it back down again (a dough scraper can also help at this stage!). Repeat this process for around 5 minutes, until the dough becomes smooth. The dough will remain sticky, but do not add more flour!
- Drizzle 2 tablespoons oil over the dough and gently massage it in, until well incorporated. The dough will begin to get sticky again.
Rest the Naan Dough
- Grease a large bowl with oil and place the dough inside. Cover the bowl with clingfilm and leave it somewhere warm to rise. The dough is ready to use when it's doubled in size. This time can vary due to the temperature; expect it to take anywhere from two to six hours.
- Once the dough has risen, knead in the extra 40 g plain flour. Grease your hands with oil and use a dough scraper/cutter to separate the dough into eight equal-sized pieces.
Roll out the Naan
- Work with one piece of dough at a time. Take one and shape into a rough ball. Sprinkle flour on your work surface and the dough ball. Using a rolling pin, gently begin to roll the naan into an oval shape. It will be very pliable, easy to stretch, and still slightly sticky. Don't roll the naan too big; the process of transferring it to the tawa/oven later stretches it more.
- Repeat this process with the other dough balls. Layer parchment paper between your rolled out naan to ensure they don't stick together, or work one-at-a-time.
Cook the Naan
- On a gas hob*, preheat your tawa over high heat for two minutes. Once hot, prepare a bowl of cold water next to your work station. Gently dust off any excess flour from the naan and lay it across your hand. Spread cold water over one side, and lay this wet side directly on the tawa. Note: A "naan cushion" can make this process easier.
- Once the naan is on the tawa, cook for around 30 seconds. Turn the tawa upside down and directly roast the naan over the naked flame. The naan surface will begin to bubble. To achieve even charring, move the tawa in circle motions. Once cooked, use a spatula to carefully pry the naan from the tawa. Repeat this process with the remaining naan.
Make the Garlic Butter
- In a small tadka/tempering pan, heat 40 g butter over low-medium heat. Add 2 tablespoons garlic (minced), and cook until the butter becomes aromatic and garlic begins to turn golden. Turn off the heat and add 20 g fresh coriander (chopped). Once the naan are cooked, spread this garlic coriander butter over the surface to infuse with a lovely flavour.


This was fabulous Ellanor.
Love your work ❤️
You know how much that means to me, Caroline! 🥰 Thank you so much. I love love love hearing about your success with my recipes!
oh wow. game changer! 1st time out. Amazing lunch. Have frizen 4 pre cooked and 2 dough balls. Been trying agrs to get this ….. Ellanor thank you xx
This is absolutely amazing feedback Adrian! I can only say thank YOU so much for following along with my recipe ☺️ There’s nothing better than having homemade naan in the freezer ready for whenever you feel like digging into a curry!
Thank you so much, Richard! I’m beyond happy to hear it’s your go-to recipe. The wet dough is a bit messy, but worth it for that undeniably fluffy texture in the finished result.
This is my goto naan recipe it is amazing. Don’t let the wet dough out you off, it’ll stick to you but just ignore that and keep going.
We have something similar in our national cuisine. We don’t use milk or yogurt though. But we fry it in a pan with just a drop of oil or some animal fat.
Ohh that sounds gorgeous Pedja — I’ll have to try it some day!
Oh, I love garlic on breads. I wanna try making this soon.
Let me know what you think when you get around to making it, Ramil! If you love garlic on breads you’re sure to adore garlic and coriander naan.
Looks yummy. I’ve only eaten Indian food a few times, but it was always a good experience.
Thank you so much, Richard! Naan is such a staple of Indian restaurants, but if you can believe it, homemade is even better (and much cheaper!)
I’m so glad I found this recipe. It was an absolute hit with the kids and the entire family!
I’m so happy to hear the family loved my naan recipe, Vanessa! Whenever children like a recipe, that’s always the highest praise 😆
Amazing recipe! Fluffy, bubbly and CHEWY, just like you get at Indian restaurants.
I really appreciate you sharing your success, Beth! Thank you for making the recipe and I’m so glad it was a hit.
There’s nothing better than being able to make restaurant-quality food at home. I hope you these naan feature in many of your curry nights (which I’m sure are absolutely mouth-watering!)
Oh my goodness and what a lovely dish! My favourite ingredients all in one naan! Thanks for sharing this and I am looking forward to trying this at home this weekend!
Nnnniiiccceeeee….I’ve always wondered how naan is made! I always love this bread! Let me save your recipe and tips for the day I make my own!
Learning to make naan at home is incredibly rewarding and satisfying! Thank you for saving the recipe, and I hope you have fun on your naan-making journey 🫓
I have been born and raised in India, but never have I ever come across a simpler recipe for naan! I love kalonji or naan sprinkled with onion seeds.
Slathering bread with plenty of garlic and butter is ALWAYS a good idea! I’m happy to hear you’ll be making naan this weekend … hopefully it’ll be a regular recipe in your house from now on!
Your wonderful feedback has made my day Bedabrata, thank you!
I’m so glad you loved the recipe and found it so easy. And I agree — kalonji are great sprinkled on top of Indian breads like kulcha or naan! There’s so many fantastic and really straightforward ways to vary the flavour by just changing up the toppings.
Hi Andrea. While you can use a ceramic or non-stick frying pan to make naan, it won’t yield the best results.
Ideally, you want a material that’s an excellent conductor of heat. That’s why an aluminium or cast iron tawa is best! If you don’t have a tawa but DO have a cast iron pan, I’d recommend using that.
The other issue with ceramic or non-stick is you won’t be able to properly “stick” the naan to the pan. You’ll need to use a kitchen blowtorch to finish the top of the naan for that characteristic bubbly effect.
Having said that, I have had a few readers send me shots of their naan that they’ve cooked without a tawa in non-stick pans, and they still look delicious, so please give it a go!
Hi, this recipe sounds delicious. I just want to ask, can I use a ceramic or non stick frying pan instead of a tawa?
This looks gorgeous and I bet it tastes even nicer! I love naan bread but have never tried making it myself.
This is your sign to give naan-making a go, Nyxie!👩🍳
This is a pretty good recipe but it will not work on an induction hob. To make naan on your stove top requires the very high temperatures you can only get from a gas hob, allowing the pan to get as hot as you want it to get. Induction hobs don’t allow your pan to get above a certain temperature because they cut out at a certain temperature and don’t heat back up unless the temperature of the pan falls. (It’s the same reason it’s absolutely futile trying to make a proper stir fry, or a rare seared steak etc.
I now only make naan in the oven, because I can heat the oven up on 250 fan and then when I put the naan in to cook I switch it to grill. This means you only need to have it in the oven for 3 minutes each side. Anything else, forget it. If you try to cook naan at a an induction hob, you have to cook it longer to make sure the inside is cooked, but at the same time this overcooks and dries out the outside.
When I make naan in the oven I put a cast iron tray on the bottom, and when I put the naan in to cook (when the oven is very hot) I pour some water into the cast iron tray at the bottom. This helps mimic the conditions of a tandoor and stops the outside of the naan from being too dry and going crispy and cracked.
Best recipe I’ve found, just as described 👍
Thank you for taking the time to leave such a detailed comment. I’m sure my readers without a gas hob will find your insight into using a fan oven and creating steam very helpful!
I agree that induction hobs can be tricky for high-heat cooking. As I acknowledged in the recipe, it’s far from ideal! However, it’s still possible to get great results with the workarounds written in the recipe (for example, using a blowtorch to bubble and char the top, or using a pizza stone in the oven). I’ve had great feedback (and photos!) from readers who have followed my recipe with these alternations, plus of course I’ve tested the methods myself.
Ultimately, my aim is to make cooking naan as accessible for as many people as possible — whether they’re cooking on gas, on induction, or in an oven.
I noticed you didn’t mention whether you tried my recipe yourself. If you did, I’d love to hear how it actually turned out for you! I’d really value your thoughts on the final result, not just the method.
Thanks again for adding to the conversation and happy naan cooking! 😊
That’s very high praise, Bill — thank you so much!
You can tell from the detailed instructions that Ellanor has spent a lot time perfecting this recipe! I’m happy to say the my results have lived up to expectations too 👍
A massive thank you for your compliments, Amy! I am so pleased my naan recipe lived up to your expectations. I’m sure you cooked them perfectly 🫓😍
Soft texture and bold flavor make Butter Garlic Naan unforgettable
Thank you 🙂 I quite agree!
this is the best and easiest naan recipe to cook at home, thanks
Feedback like this makes my day! Thank you so much, Jon. Glad you loved the naan!